Bleed Alert And Fix
Script for Adobe InDesign
Latest update 12/5/2023, version 2.3
Fix bleed in InDesign documents. Script finds bleed problems and fixes each by resizing the frame and/or the graphic placed within it.
- Specify bleed and distance from edge
- Reveal all cases of faulty bleed
- Confirm each change, undo, or skip
How-to Video
How to use the script
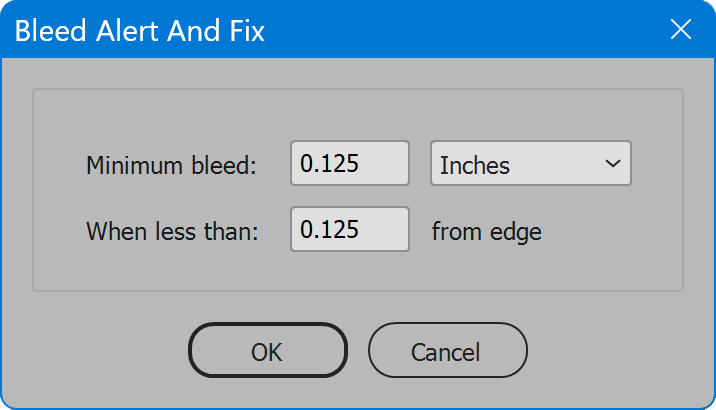
The interface is a single section with two values to enter. Click the OK button to begin.
Minimum bleed — the amount of bleed expected. To the right is a drop down list of measurement units used for all values.
When less than — the distance from any edge that if less than, an element should bleed.
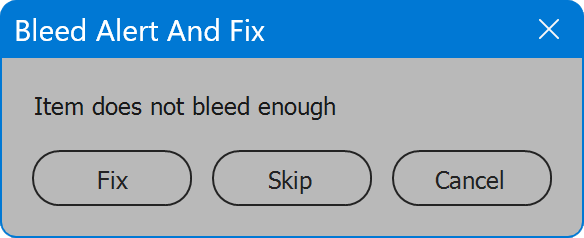
The script looks for elements the specified amount or less from any edge, but not reaching the specified bleed value. For each element found, the user is given a chance to correct the problem or skip.

Fix — correct the selected element. If a placed graphic, the script first looks at whether the graphic reaches the bleed, in the event the frame is correctly positioned to bleed, but the graphic position within the frame does not reach the bleed. In this case, the graphic is scaled to reach the bleed while holding the opposing center anchor. For example, if an item needs bleed on the left, the right anchor keeps its position as the left side is pulled out to increase the graphic size. Second, if a frame edge does not reach the bleed, it is pulled out so that it does. When more than one edge fails to reach the bleed, the process happens for each faulty edge.
Skip — the selected element is not changed, and the next bleed problem is selected. The confirmation dialog is then displayed again, until no further bleed problems remain.
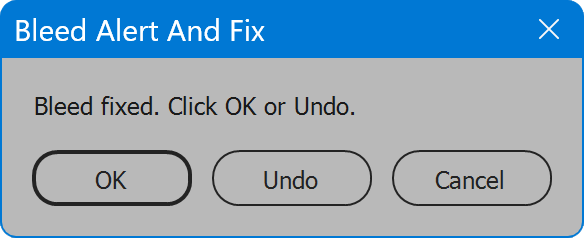
When Fix is clicked, the buttons change.

The button Fix becomes OK, and the button Skip becomes Undo. Click OK to accept the change, or click Undo to revert the change and return to the prior confirmation dialog, where Skip may be chosen instead, if desired.
Cancel — processing ceases without further changes. Any changes previously accepted remain. If desired, the Edit menu item Undo restores the last change made, and the change before that, etc.
The confirmation dialog appears centered on screen and near the top of the window. If the dialog obscures the layout, it may be moved to another location on screen, even to a secondary display. The dialog will maintain its new position until the next launch of the script.
Bleed Alert And Fix
Change log: bleed-alert-and-fix.txt
For help installing scripts, see How to Install and Use Scripts in Adobe Creative Cloud Applications.
IMPORTANT: scripts are developed for the latest Adobe Creative Cloud applications. Many scripts work in CC 2018 and later, even some as far back as CS6, but may not perform as expected, or run at all, when used in versions prior to 2018. Photoshop features Select Subject and Preserve Details 2.0 definitely fail prior to CC 2018 (version 19) as the features do not exist in earlier versions. For best results use the latest versions of Adobe Creative Cloud applications.
IMPORTANT: by downloading any of the scripts on this page you agree that the software is provided without any warranty, express or implied. USE AT YOUR OWN RISK. Always make backups of important data.
IMPORTANT: fees paid for software products are the purchase of a non-exclusive license to use the software product and do not grant the purchaser any degree of ownership of the software code. Author of the intellectual property and copyright holder William Campbell retains 100% ownership of all code used in all software products regardless of the inspiration for the software product design or functionality.

