Images Before And After
Script for Adobe Photoshop
Latest update 12/10/2023, version 4.9
The script creates side-by-side comparison images to show before and after editing. Comparison images are output to JPEG that can be sent to clients for approval. In batch mode the script processes a folder of images, or the user may choose to process the active image open in Photoshop. In either case, there are three ways to reference before images: 1. a folder of original images; 2. the lowest layer of after images; or 3. after images without the highest group.
- Compare corrections to original, side-by-side
- Three options to reference before images
- Process active image or folder of images
- Simulate a color profile
- Set PPI
- Limit pixels in either dimension
- Specify labels to indicate before and after
Images Before And After
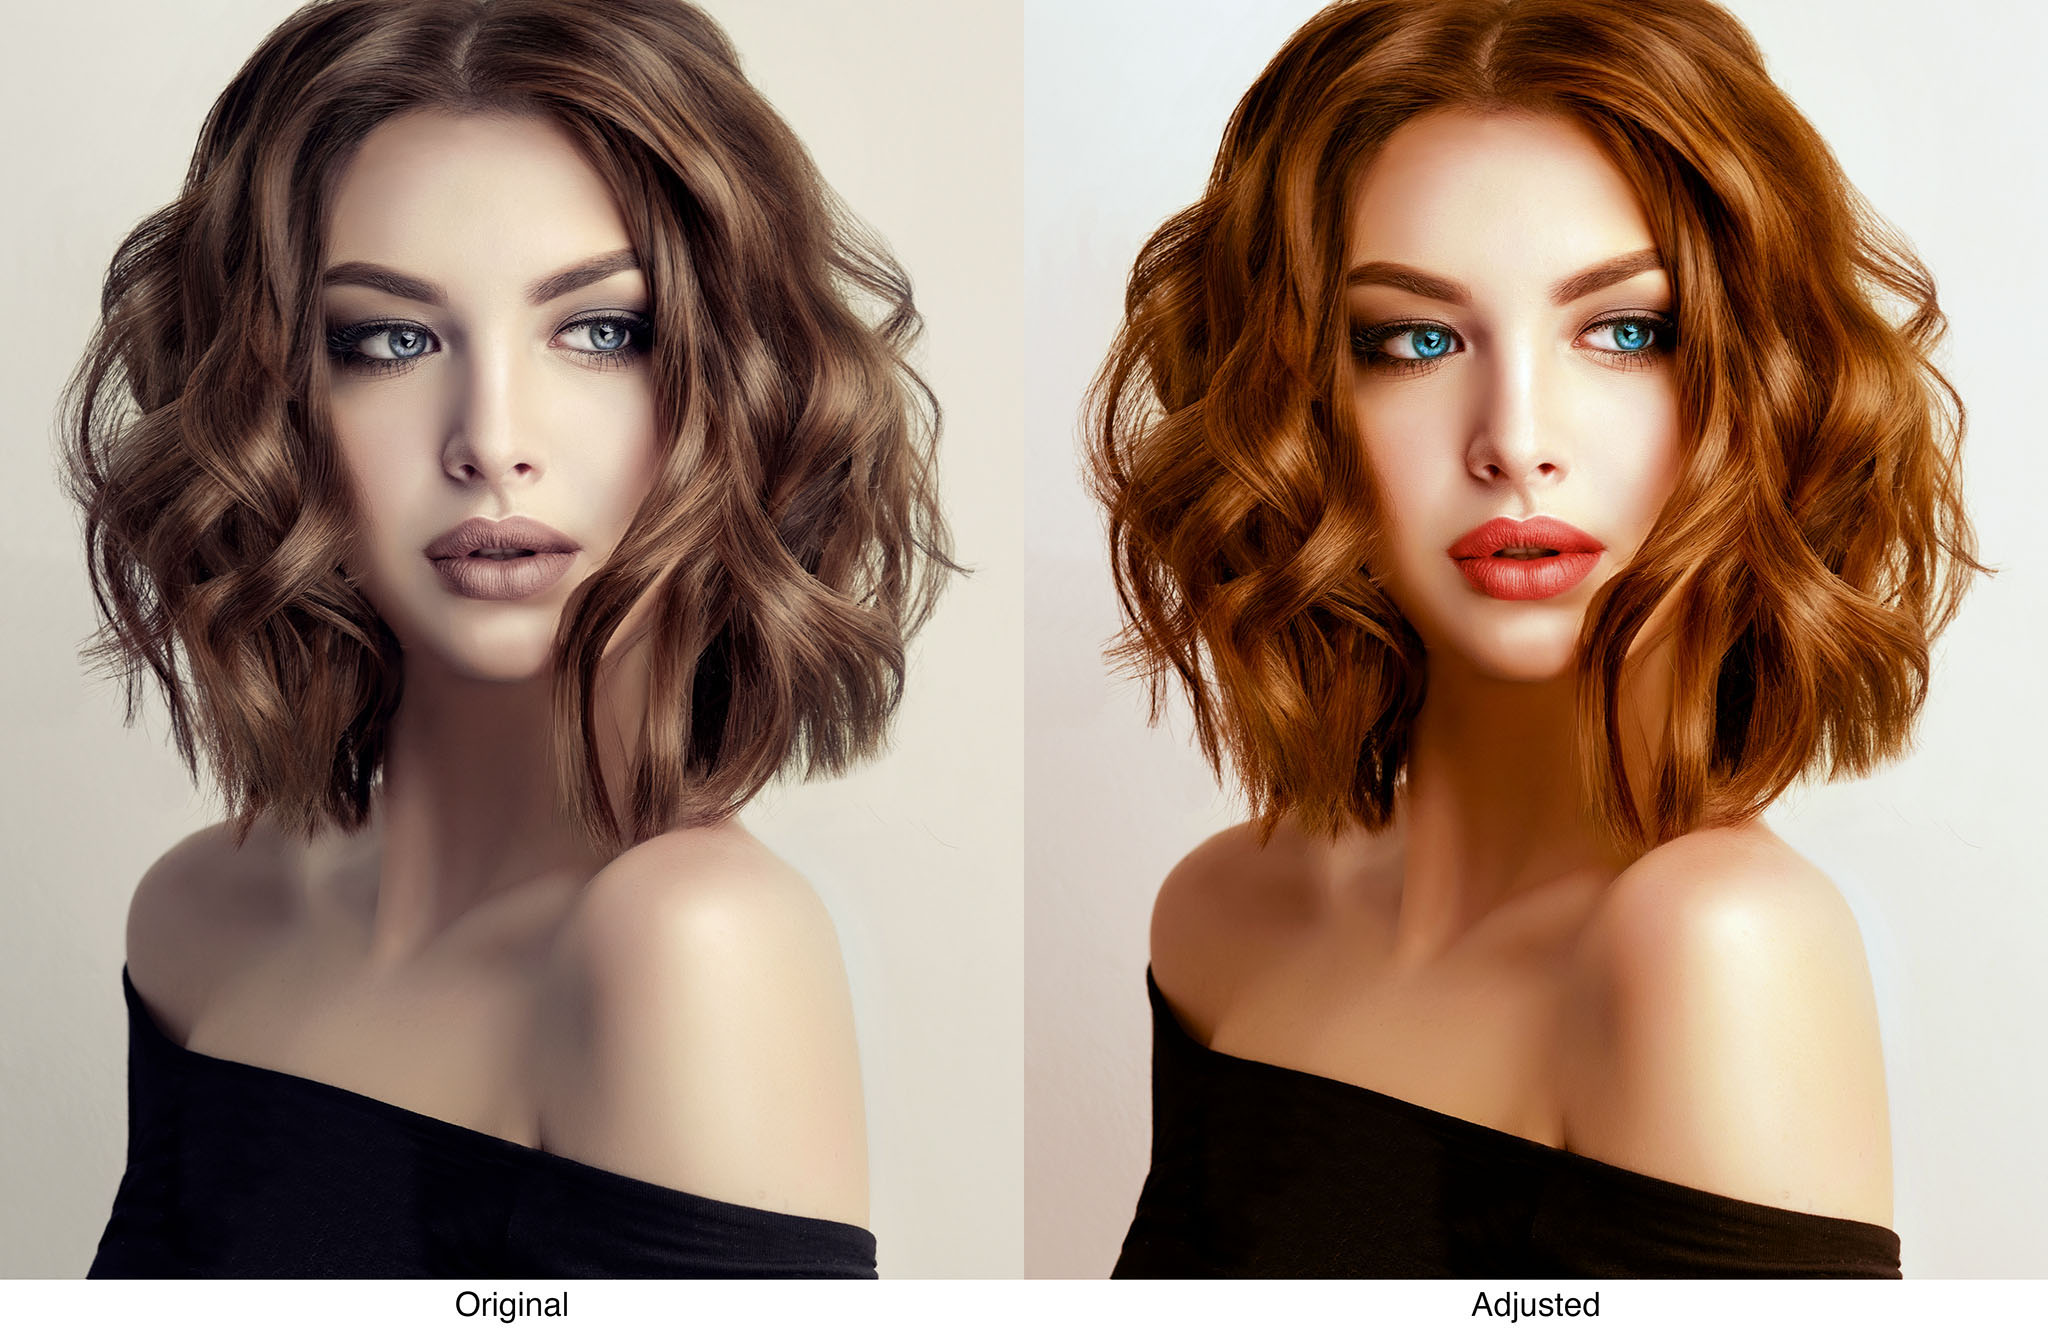
Example output of Images Before And After script
How-to Video
How to use the script
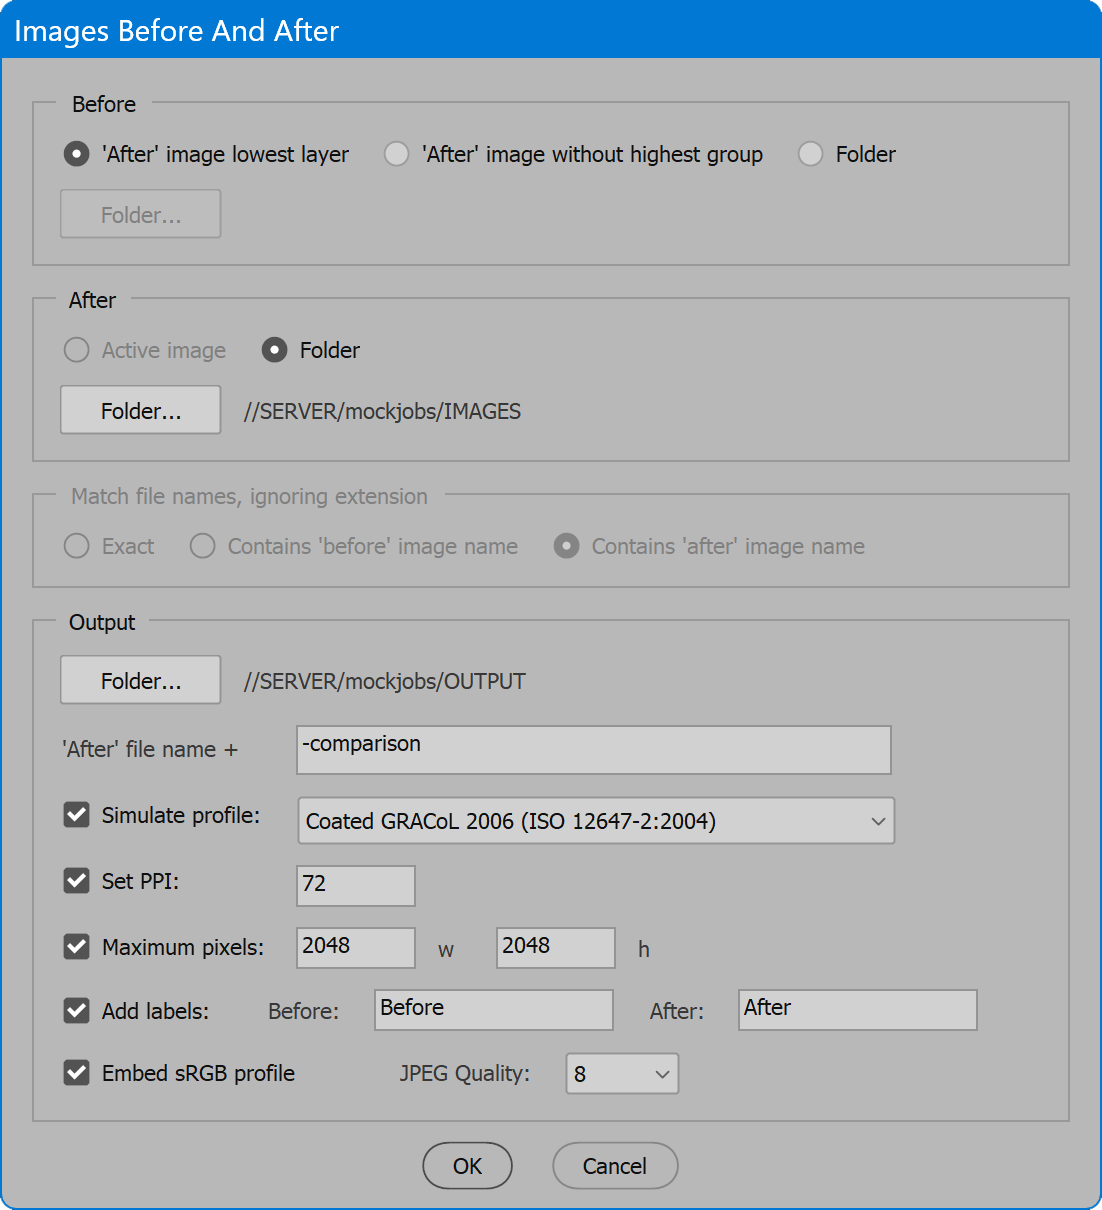
The interface has four sections: Before, After, Match file names, and Output. Enable desired options and click the OK button to begin. If processing the active image, any errors or concerns are reported immediately. If processing a folder, a progress bar is displayed. To cancel processing, press the ESC key. Otherwise, when complete, the number of images processed is reported. If any errors or concerns are encountered, a log file is written to the output folder and the user is notified.
Section 1: Before
'After' image lowest layer — the before image is created from the lowest layer of the after image. Lowest layer is defined as a layer containing imagery (pixel data), not a group or adjustment layer, and without regard for its current visibility (if hidden it is made visible). Whether the lowest layer is Background (typical) or is a layer nested inside a group, the layer is forced to the bottom, and all layers and groups above the layer are removed. For most color correction scenarios, this results in the equivalent of the unaltered original image. For situations in which the lowest layer is not equivalent to the original, use one of the other options to reference before images.
'After' image without highest group — the before image is created by duplicating the after image and then removing the highest layer group. This option is for workflows that add a group of adjustment and other layers to the image each correction round. Removing the highest group then represents the last edit of the image (or original if the first round of corrections). If the image layer structure does not lend itself to this approach, use one of the other options to reference before images.
Folder — the before images are loaded from a folder of original images. Click the Folder button to select the desired location. For each after image, the specified folder is searched for a file that matches based on the choice in section 3, Match file names, ignoring extension.
Important note: If creating comparison images using a folder of before images, the images must match the dimensions of the after images. Any images that differ in dimensions may produce unpredictable results. If alterations to the images since original includes cropping or resizing, use one of the other options to reference before images.
Section 2: After
Active image — processes the image that is currently open and the top-most window if multiple images are open.
Folder — processes a folder of after images. PSD and TIF are recognized. Other file extensions are ignored considering that after images are assumed to be retouch corrections likely using adjustment and other layers, unsupported by formats other than PSD or TIF. Click the Folder button to select the desired location. If no PSD or TIF files are found, the user is notified.
Section 3: Match file names, ignoring extension
When the choice in section 1, Before, is a folder, this choice determines how after images are matched to before images. For each after image, the specified folder is searched for a file that matches the base name of the image (file name without extension). For example, if original files were submitted as .jpg, but working files are saved as .psd, images match regardless of the difference in file extension. If no matching before image is found, an alert is logged and a comparison image is not produced.
Exact — the before and after image base names match precisely.
Contains 'before' image name — the after image base name contains the before image base name. Use when a suffix or other alteration is made to after image file names. For example, after image IMG_2345_edit.psd matches before image IMG_2345.jpg
Contains 'after' image name — the before image base name contains the after image base name. Use when a suffix or other alteration is made to before image file names. For example, after image IMG_2345.psd matches before image IMG_2345_orig.jpg
Section 4: Output
Folder — the location to which comparison images are saved. Click the button and select the desired location.
'After' file name + — a suffix of characters appended to each comparison image file name. The characters entered must be legal to use in file names. Illegal characters detected are changed to a dash. A suffix is required to prevent overwriting files and may not be set blank.
Simulate profile — the comparison image is converted to the specified profile and then to sRGB. This step makes evident any color shifts introduced by conversion to the project’s destination profile.
Set PPI — changes the pixels per inch of the comparison image. The option does not resample the image; it only sets the resolution. Use the next option, Maximum pixels, to alter comparison image size.
Maximum pixels, width and height — limits the final pixel dimensions of the comparison image. Enter a value in pixels for the width and/or height. It is acceptable to omit one of the dimensions. In that case, the entered dimension is limited and the other falls wherever it may. When both values are entered, neither dimension exceeds the value entered. One dimension may result in fewer pixels than entered if necessary to maintain proportions. In other words, setting both values does not define precise width and height; it only defines the upper limit of each dimension.
Add labels — inserts descriptive labels below the before and after images to make clear which is which. Enable the checkbox and enter desired label text. When enabled, a blank area is added to the bottom of the comparison image to make room for the labels. Without labels, know the left-hand image is before and the right-hand image is after.
Embed sRGB profile — embeds the color profile into comparison images.
JPEG quality — valid range is from 0 to 12. 0 is extreme compression resulting in low quality. 12 is light compression that is virtually indistinguishable from the original, the highest possible quality, which of course, results in the largest file size.
Other notes
Because comparison images are output as JPEG, some image modes are converted or not allowed. Multichannel mode is not compatible, and if encountered, an alert is logged and a comparison image is not produced. Bitmap, grayscale, and duotone modes are converted to RGB for comparison images. When these image modes are encountered, additional processing is automatic and no alerts are logged. If an image contains spot color channels, the channels are merged into the RGB portion to replicate the appearance of the image with the spot colors, and an alert is logged.
When files are output, any existing files of the same name in the output folder are replaced without alert.
Output to PDF. To create a PDF of comparison images combined into a single document, use the Acrobat feature File menu, Create, Combine Files into a Single PDF. Add the comparison images, combine, and then save the resulting PDF.
Available color profiles. For the option Simulate profile, the list of profiles from which to choose is compiled by searching known locations in the system for .icc/.icm files and extracting the profile name. This occurs each time the script is launched. The list should include most of the same profiles Photoshop displays in dialogs such as Color Settings, but it doesn’t match exactly. If a needed profile does not appear in the list, add the profile to a location both Photoshop and the script look for profiles (below) and relaunch the script.
macOS
:Library:ColorSync:Profiles
Windows
\Windows\System32\spool\drivers\color
Images Before And After
Change log: images-before-and-after.txt
For help installing scripts, see How to Install and Use Scripts in Adobe Creative Cloud Applications.
IMPORTANT: scripts are developed for the latest Adobe Creative Cloud applications. Many scripts work in CC 2018 and later, even some as far back as CS6, but may not perform as expected, or run at all, when used in versions prior to 2018. Photoshop features Select Subject and Preserve Details 2.0 definitely fail prior to CC 2018 (version 19) as the features do not exist in earlier versions. For best results use the latest versions of Adobe Creative Cloud applications.
IMPORTANT: by downloading any of the scripts on this page you agree that the software is provided without any warranty, express or implied. USE AT YOUR OWN RISK. Always make backups of important data.
IMPORTANT: fees paid for software products are the purchase of a non-exclusive license to use the software product and do not grant the purchaser any degree of ownership of the software code. Author of the intellectual property and copyright holder William Campbell retains 100% ownership of all code used in all software products regardless of the inspiration for the software product design or functionality.
