Crop To Template
Script for Adobe Photoshop
Latest update 5/15/2024, version 3.4
Crop images to fit inside guides of a selected template document.
- Crop active image or a folder of images
- Align images center or preferred edge inside guides
- Option to use content-aware fill
- Append suffix to output file names
- Output to BMP, JPG, PNG, PSD, or TIF
- Save and restore all settings
- User-configurable localization
Also see related scripts:
Auto Crop Advanced
Auto Crop People
Crop Center Head
Crop To Margins.
FREE 30 DAY TRIAL
Single-user perpetual license
Pay once, no subscription,
use forever
IMPORTANT: the script depends on the Photoshop feature Select Subject that was introduced in Photoshop CC 2018 (version 19). Earlier versions of Photoshop will not run this script correctly. For best results use the latest version of Photoshop as the Select Subject feature has improved greatly in recent years.
How-to Video
NOTE: after video production, features have been added in response to user feedback: re-word vertical option and add horizontal options for subject less than guides; images less than crop, added the options Scale to fit, Log, and Save in subfolder. Output format BMP was added, and the option Single merged layer. See instructions below for details.
Before using the script
The script requires a template document that images are fit into. This document must be open before running the script and selected in the script interface. The pixel dimensions of the template document determine the final dimensions of each cropped image. Ideally the template document has four guides, two in each direction: one each top and bottom, and one each left and right.
These guides do not dictate a precise finished size; they are a guide of how the script sizes images within the template document, which is the precise finished size. Because proportions are maintained, one of the dimensions, either height or width, is likely to fall short of the guides once the other dimension reaches the guides. By default, images are centered left to right and positioned to the bottom guide. To override the defaults, set the option Subject less than guides as desired (described in the section Options).
Guides may be absent in either direction, in which case margins on that axis are zero. A single guide in either direction does not work and reports “Template has improper guides.”
The script reads the guides and considers the highest and lowest to be top and bottom, and the guides most left and most right to be left and right. Additional guides between the outermost guides are ignored.
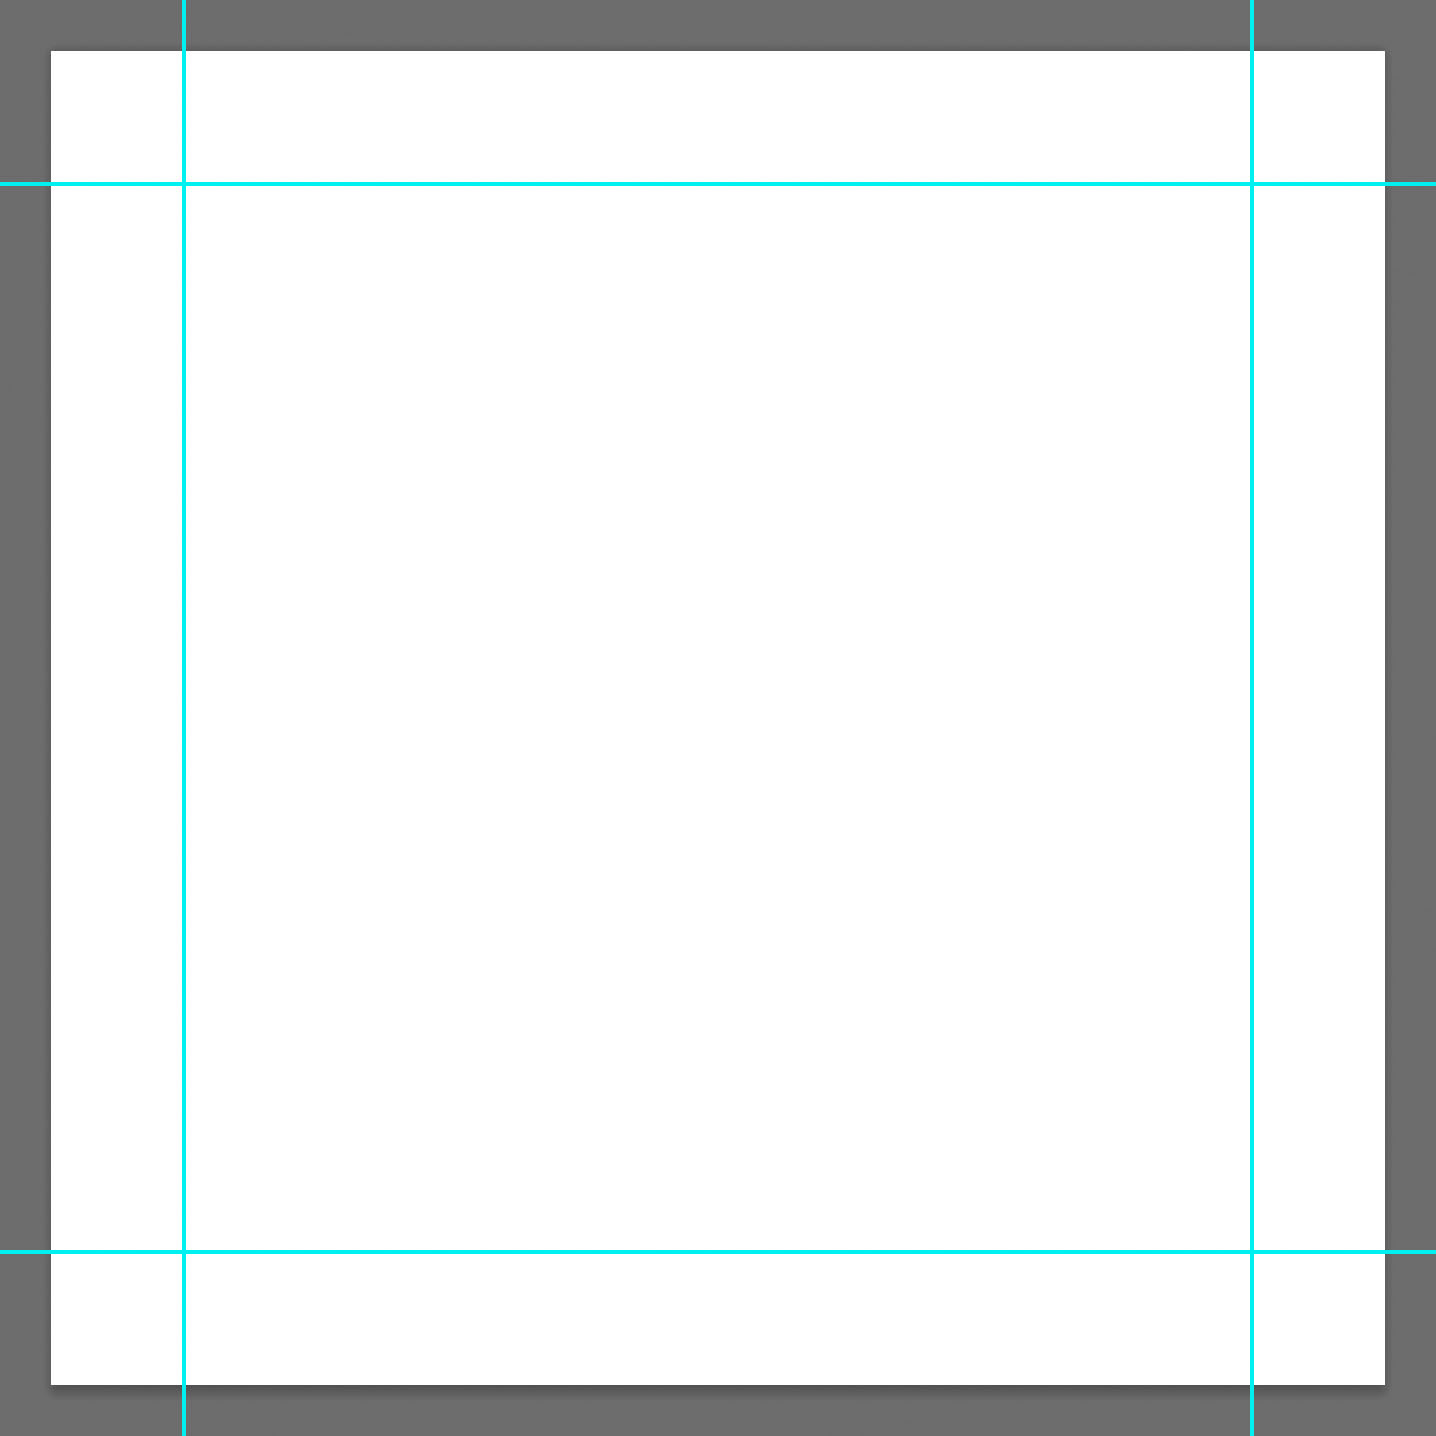
Example 1: empty template document with guides to indicate margins.
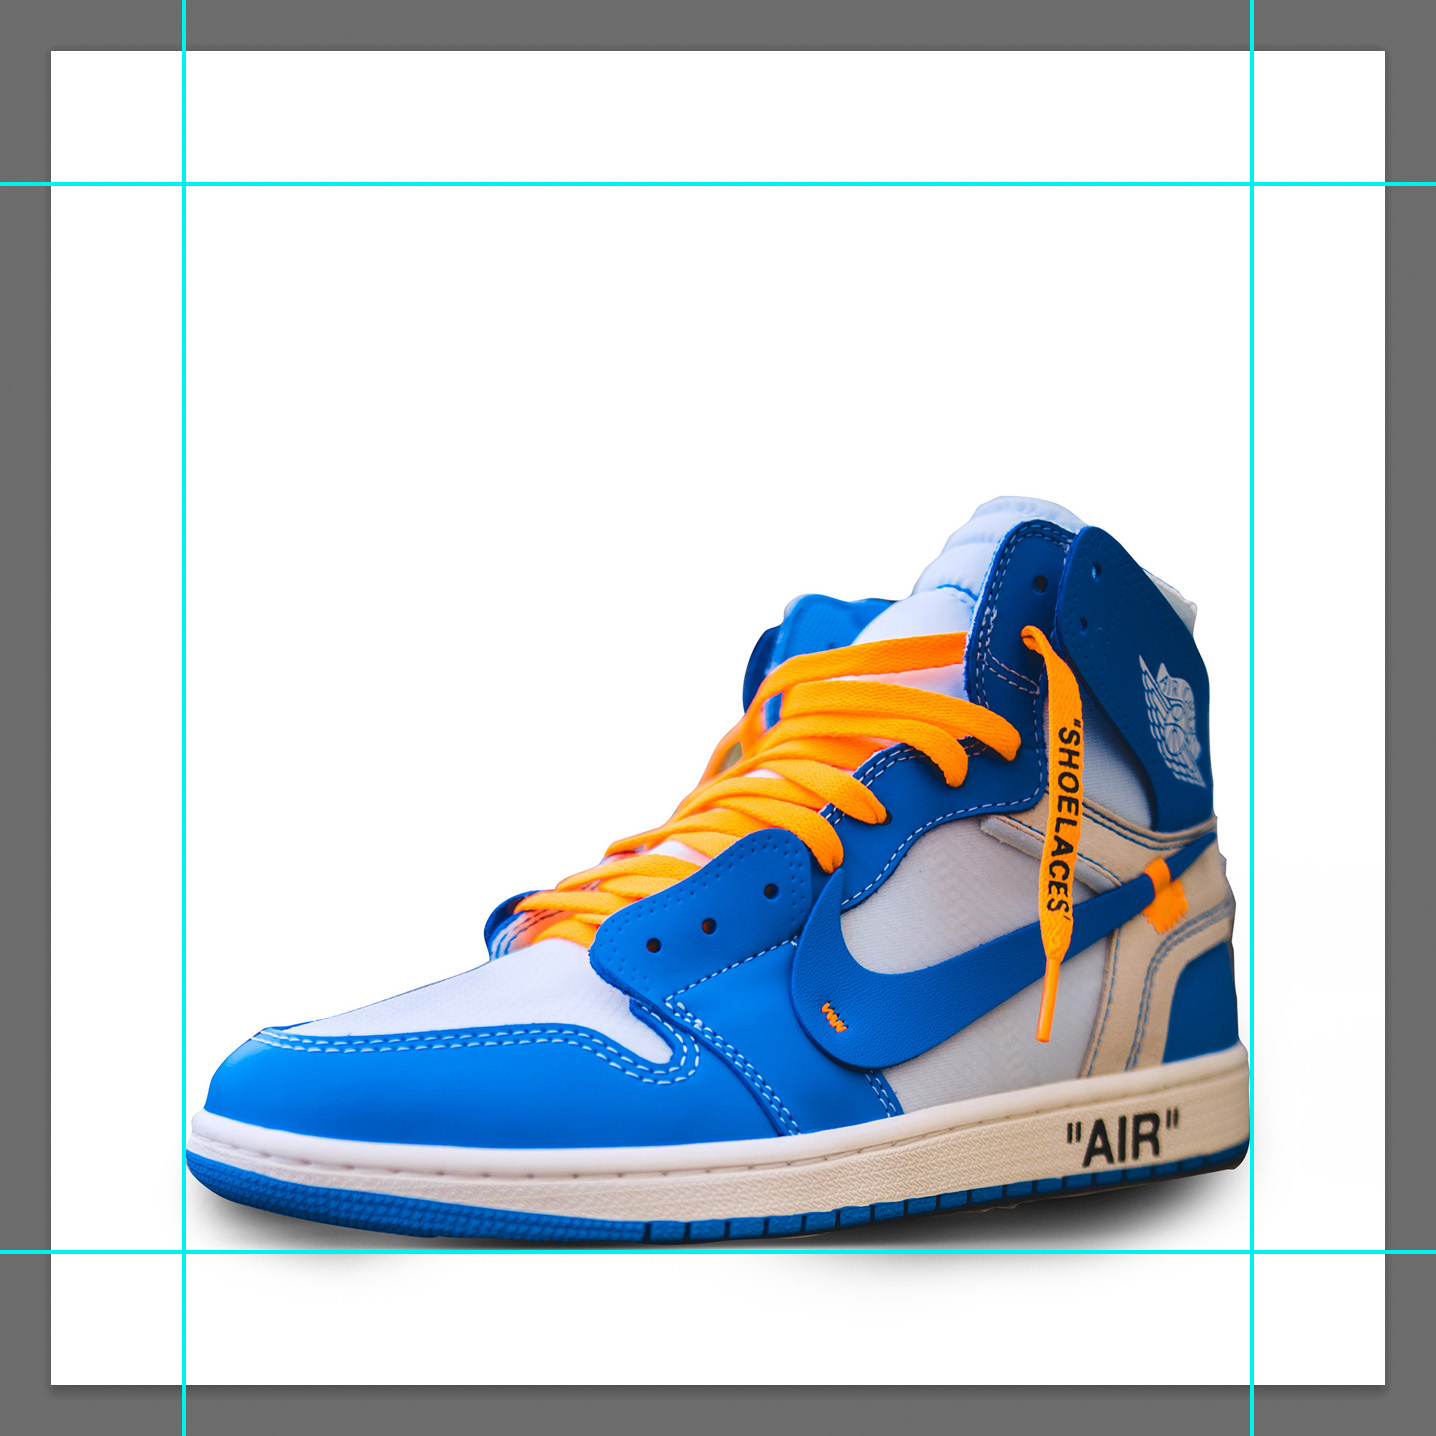
Example 2: result of image fit into the template and guides using the vertical position option Bottom.
How to use the script
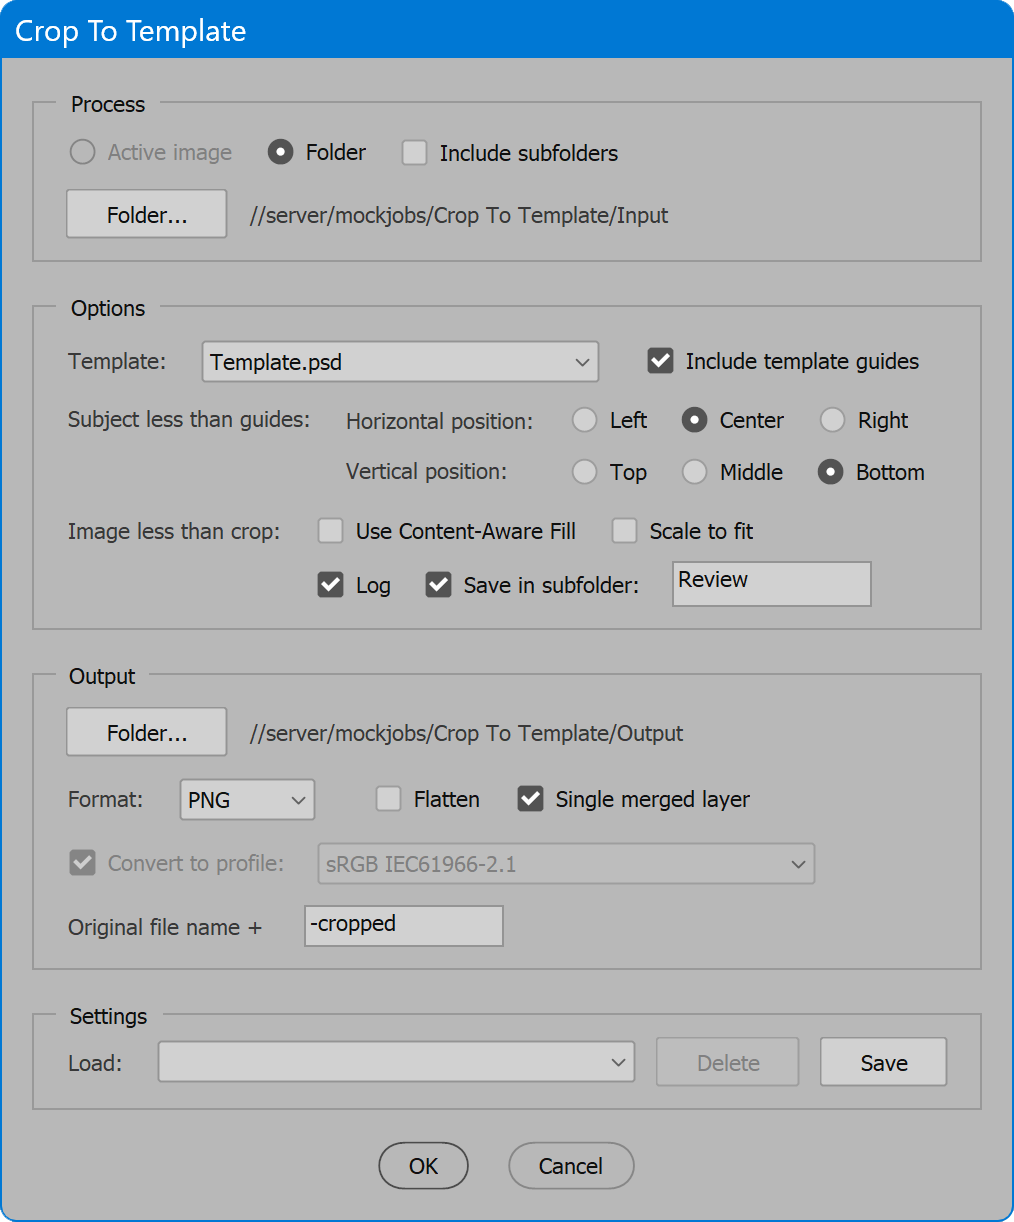
The interface has four sections: Process, Options, Output, and Settings. Set options as desired and click the OK button to begin. If processing the active image, any errors or concerns are reported immediately. If processing a folder, a progress bar is displayed. To cancel processing, press the ESC key. Otherwise, when complete, the number of images processed is reported. If problems occur, a log file is written to the output folder, and the user is notified.
The script depends on the accuracy of Photoshop’s Select Subject feature, which works well in most cases, but isn’t perfect 100% of the time. At a minimum, the user should open Bridge and scan through thumbnails of cropped images to ensure the results are satisfactory. For any images that crop improperly, open in Photoshop and crop manually.
As of Photoshop version 23.5.0, Select Subject added the options Device (Quicker results) and Cloud (Detailed results). For most installations the default is Device, the only choice prior to version 23.5.0. The script uses whatever is the default method. To change the default method to the superior Cloud option, go to Preferences (Windows) or Settings (macOS), section Image Processing. Set the drop-down list Select Subject Processing to the desired default method.
Section 1: Process
Active image — processes the image that is currently open and the top-most window if multiple images are open. When this option is selected, the section Output is disabled. It is for the user to perform additional transformations if needed and Save As the cropped version of the image in the desired format. A revised file name should be used to preserve the original un-cropped version of the image. If there is only a single image open, it can only be the template, so this option is disabled and processing a folder is selected instead.
Folder — processes a folder of images. Click the Folder button to select the desired input folder. If the option Include subfolders is enabled, all folders within the selected folder are also processed, and the same subfolder structure is created in the output folder. Each image file found is cropped to fit into the template document, and the image is saved in the format selected in the section Output.
Section 2: Options
Template — from the list of open documents, choose the desired template document.
Subject less than guides — when the height of the subject or the width of the subject does not reach the guides, these options tell the script how to position the image.
Horizontal position — when the height of the subject reaches the guides before the width does, choose whether to position subjects to the Left guide, Center between the guides, or to the Right guide.
Vertical position — when the width of the subject reaches the guides before the height does, choose whether to position subjects to the Top guide, Middle between the guides, or to the Bottom guide.
If the image fits the guides both horizontally and vertically there is no need to shift the subject and these options have no effect.
Image less than crop — when the result of sizing the image does not reach one or more edges of the cropping boundary, the user may choose to complete the missing image using one (or none) of the two options.
Use Content-Aware Fill — content-aware cropping is used to complete the missing image.
Scale to fit — the image is scaled until it reaches the cropping boundary. This alters the margins, but no more than the minimum required to reach the desired size without creating additional image area.
The options Use Content-Aware Fill and Scale to fit are mutually exclusive. Choose one or the other, or neither. The script does not allow both.
If neither option is selected, the missing image is filled with the current background color when the original image is flattened (single background layer with no other layers). If the original image is one or more layers with or without transparency, the missing image is transparent, unless processing a folder and the option Flatten is enabled, in which case the missing image is filled with white. Masked images are never considered less than crop and remain transparent, unless flattened, which results in a white background.
Log — available when processing a folder. Enable the option and when the image is less than crop, an alert is added to the log file along with a description of the remedy. When processing the active image, this option is disabled, and any alerts and remedy are reported when processing is complete.
Save in subfolder — available when processing a folder. Enable the option and enter a name for a subfolder under the output folder into which images less than crop are saved rather than the top level of the output folder. When enabled, the subfolder is created if it does not exist, and all images less than crop are saved to it. The options Use Content-Aware Fill or Scale to fit may be enabled, or not. No matter the remedy, or none, each image less than crop is separated from others so the results may be inspected.
Section 3: Output
Folder — the location to which cropped images are saved. Click the Folder button and navigate to the desired location.
Format — select the file format to output. Choices are BMP, JPG, PNG, PSD, or TIF.
Flatten — the result is a single “Background” layer. BMP and JPG always perform this step.
Single merged layer — applies to formats PNG, PSD, and TIF. When enabled, hidden layers are discarded, and the remaining layers are merged to a single layer. If a layer mask remains, it is applied. PNG does not support multiple layers, so this step always occurs if not flattened. The option does not apply to BMP or JPG as both do not support transparency and must be flattened.
The options Flatten and Single merged layer are mutually exclusive. Choose one or the other, or neither. The script does not allow both.
Understand that some formats and situations always flatten or reduce the image to a single merged layer. For example, output to BMP or JPG is always flattened because the formats do not support layers. The PNG format supports one layer at most, so the image is always reduced to a single merged layer if not flattened. As well, images converted from RGB to CMYK may flatten or merge to a single layer to preserve the effect of adjustment layers, which cannot reliably convert from one color space to another.
Quality — applies to JPG format only. Valid range is from 0 to 12. 0 is extreme compression resulting in low quality. 12 is light compression that is virtually indistinguishable from the original, the highest possible quality, which of course, results in the largest file size. 10 to 12 is recommended for print or other high-quality reproduction. For web images, 5 to 8 is an acceptable range.
Convert to profile — converts color to the selected profile prior to output.
The formats JPG, PSD, and TIF always embed color profiles. BMP and PNG do not embed color profiles.
Original file name + — a suffix of characters appended to each output file name. The characters entered must be legal to use in file names. Any illegal characters are automatically removed. Having no suffix is allowed, in which case output file names exactly match input file names.
When files are output, any existing files of the same name in the output folder are replaced without alert.
Section 4: Settings
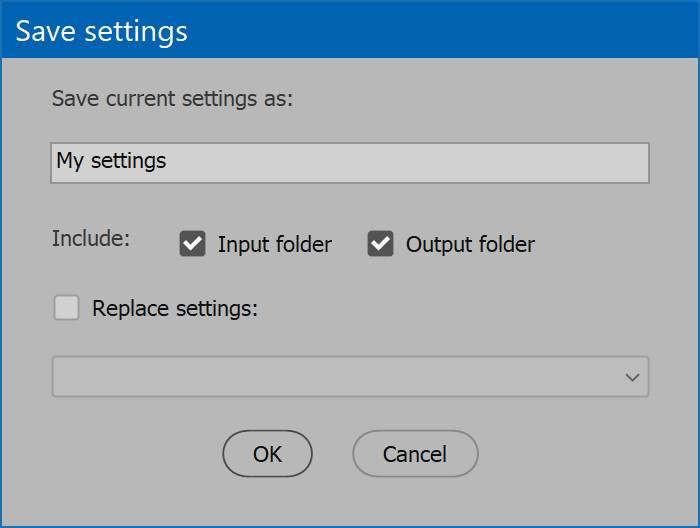
The current options may be saved and restored later. Select from the Load drop-down list to choose saved settings, and the current options are updated. Click the Delete button, and the saved settings selected in the Load drop-down list are permanently removed. Click the Save button, provide a name for the settings, and the current options are preserved. If the name already exists, the user may choose to replace the saved settings. Or click the checkbox Replace settings, and choose the settings to replace.
The script provides default saved settings named [Default]. These settings cannot be deleted but may be updated to the current values. Save settings, click the checkbox Replace settings, and choose [Default].
When settings are saved, there is also the option to include Input folder and/or Output folder.
Each time the script is launched, the input and output folders are restored to the last location used. To override these defaults, enable the options to include Input folder and/or Output folder. When the saved settings are loaded, the input folder and/or output folder are restored to the values saved.
Available color profiles
For the option Convert to profile, the list of profiles from which to choose is compiled by searching known locations in the system for .icc/.icm files and extracting the profile name. This occurs each time the script is launched. The list should include most of the same profiles Photoshop displays in dialogs such as Color Settings, but it doesn’t match exactly. If a needed profile does not appear in the list, add the profile to a location both Photoshop and the script look for profiles (below), and relaunch the script.
macOS
:Library:ColorSync:Profiles
Windows
\Windows\System32\spool\drivers\color
Language
By default the script language is US English, which does not require further download or configuration. To have the script interface display other languages, choose from the available languages below. Download and copy the .i18n file to the script folder alongside the script. When launched, the script detects the language file and displays interface text in that language. If your language is not listed, download the English file and translate it. The file is plain text formatted as JSON, containing interface text in English, and a second value for its translation, which for the English file is the identical text. Copy the file and rename it to replace “en” with the relevant code for your language, then edit the file to change each line’s second value to the translation in your language. For more detailed instructions of how to edit and install i18n files, see How to Localize Scripts.
English: crop-to-template-en-i18n.zip
FREE 30 DAY TRIAL
Single-user perpetual license
Pay once, no subscription, use forever
Change log: crop-to-template.txt
For help installing scripts, see How to Install and Use Scripts in Adobe Creative Cloud Applications.
IMPORTANT: scripts are developed for the latest Adobe Creative Cloud applications. Many scripts work in CC 2018 and later, even some as far back as CS6, but may not perform as expected, or run at all, when used in versions prior to 2018. Photoshop features Select Subject and Preserve Details 2.0 definitely fail prior to CC 2018 (version 19) as the features do not exist in earlier versions. For best results use the latest versions of Adobe Creative Cloud applications.
IMPORTANT: by downloading any of the scripts on this page you agree that the software is provided without any warranty, express or implied. USE AT YOUR OWN RISK. Always make backups of important data.
IMPORTANT: fees paid for software products are the purchase of a non-exclusive license to use the software product and do not grant the purchaser any degree of ownership of the software code. Author of the intellectual property and copyright holder William Campbell retains 100% ownership of all code used in all software products regardless of the inspiration for the software product design or functionality.
